
Replacing shingles is one of those projects that looks straightforward from the driveway but reveals a dozen decisions once you’re on the roof. Materials matter, sequencing matters, and a few small missteps can cost you in leaks or premature wear. I’ve managed shingle roof replacement on homes from coastal cottages to high-elevation cabins, and the same fundamentals apply across climates. This checklist walks you through those fundamentals in the order they should happen, with practical judgment calls where homeowners and even seasoned pros often get tripped up.
When replacement is truly the right call
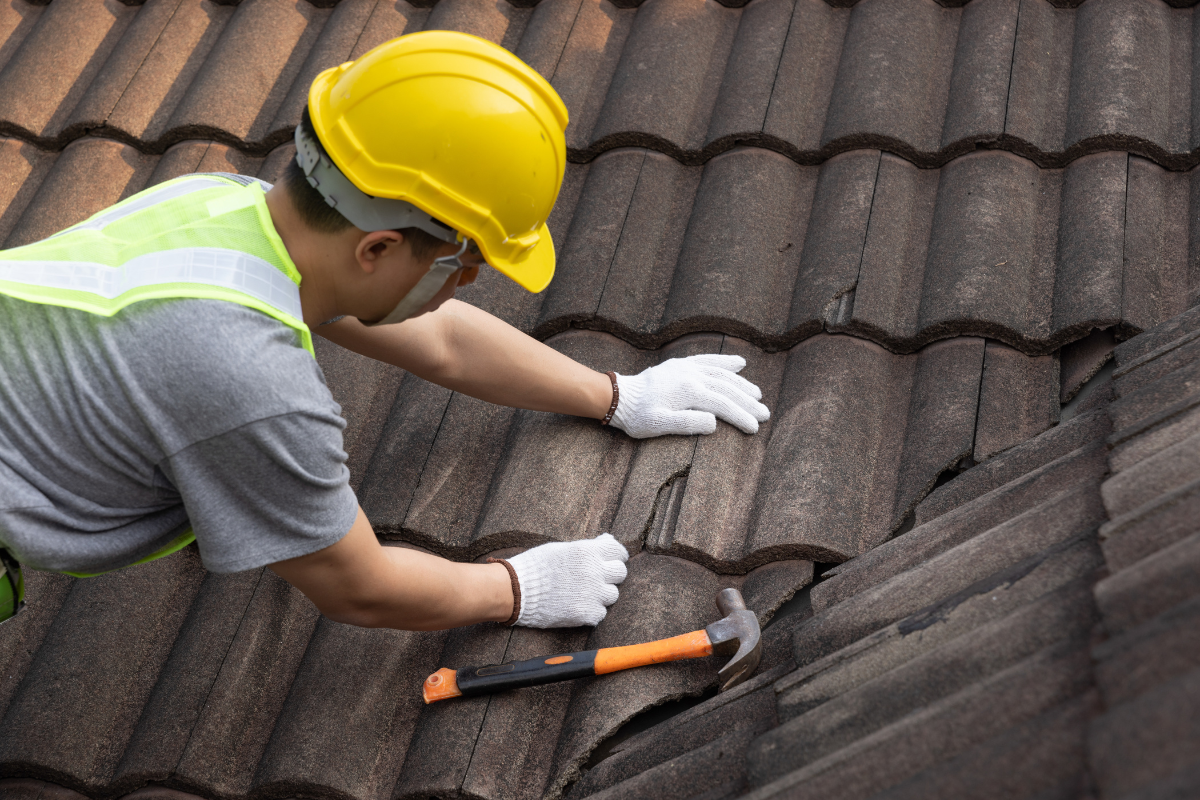
Not every aging shingle roof is ready for a tear-off. Some roofs only need isolated roof shingle repair at penetrations or along an exposed ridge. If you see widespread granule loss that exposes the asphalt backing, diagonal cracking that follows the mat, or shingles curling hard at the tabs, you’re generally past the point of patching. Wind-lifted tabs across more than a plane or two also tends to signal systemic age or nail seal failure. I tell clients to consider the “rule of thirds.” If a third of the field shows failure, your labor will be better spent on roof shingle replacement rather than chasing recurring leaks.
Impact damage is a separate category. After a hail event, look for bruising that feels soft under the granules, not just cosmetic scuffs. If you can press a thumb into the mark and it yields, the mat is compromised. Insurance adjusters often approve replacement in those cases, especially when multiple test squares meet the threshold.
Finally, check the attic. Staining on the underside of the deck, shiny nail points from condensation, or rust on mechanical fasteners can point to ventilation or moisture problems that will outlast any new shingles unless corrected during the project.
Scoping the project the right way
A proper roof shingle installation plan starts with measurements and an honest inventory of roof complexity. Gables are straightforward. Valleys, dormers, dead valleys behind chimneys, or low-slope transitions add time, materials, and details that need attention.
Measure the footprint of each plane, then adjust for pitch. A 6:12 pitch multiplier is roughly 1.12, 8:12 is roughly 1.22. If you prefer accuracy, a pitch gauge and a long level will get you there in a couple of minutes. Count all penetrations. Note fascia conditions, chimney flashing condition, and whether gutters will need to be detached. Document with photos and sketches. This becomes your reference in case conditions change or a hidden problem appears during tear-off.
This is also the moment to choose your system. Not just the shingle, but the underlayment type, ice barrier locations, ridge vent or box vents, drip edge, starter course products, and flashing approach. Manufacturers warrant systems, not just shingles, and a shingle roofing contractor who lives in the warranty world will tell you small mismatches can void coverage.
Safety and site setup
Nothing slows a project more than a preventable injury or damage to landscaping. On two-story work or steep pitches, I use a combination of ridge anchors with personal fall arrest systems and roof brackets with planks. On lower pitches where arrests are not legally required, I still anchor if the roof is dusty or there is morning dew. Gloves, eye protection, and a hard hat are standard. Good shoes with clean tread matter as much as any tool.
On the ground, map out the drop zone. Move patio furniture, cover shrubs and AC condensers with breathable tarps, and set up a debris chute or a designated dump area with plywood to protect lawns. Assign one person to ground cleanup throughout the day, not just at the end. It keeps nails from embedding in tires and keeps the jobsite professional for neighbors.
Tear-off without tearing up
The temptation is to rush the tear-off to “see the deck,” but rushed tear-offs create deck damage and a blizzard of nails. Work one manageable section at a time, top down. A shingle shovel or a pitchfork-style tear-off tool pops shingles and old nails in one pass. In cold temperatures, shingles fracture and release more cleanly. In heat, take smaller bites to avoid tearing underlayment and pulling up wood slivers with old ring-shank nails.
As you expose the deck, pause to pull remaining nails flush and sweep the surface. I keep a magnetic sweeper on the roof to catch stragglers. Excess https://cruzpiyt376.wpsuo.com/preventative-maintenance-tips-for-shingle-roofing-longevity nails left under new underlayment create pressure points that telegraph through the shingles later.
If you’re overlaying rather than full tear-off, accept that you’re trading time for performance. Overlays trap heat, add weight, and make leak tracing a headache. They can be acceptable on a single-layer roof in good structural condition with a simple gable configuration, but they rarely pencil out over the life of the roof.
Deck inspection and repairs that actually hold
Look for soft spots especially near eaves, valleys, and below plumbing vents. Use a flat bar to test deflection. A 200-pound person should not feel sponginess between rafters. Dark staining with solid wood can be fine if it’s old and dry, but any punky texture needs replacement. Replace sections back to the center of framing members. Stagger joints so you never create a long seam across rafters. For plank decks with wide gaps, add a layer of thin plywood or replace the worst boards. Asphalt shingles prefer a continuous, solid substrate.
Fasten replacement sheathing with ring-shank nails, not drywall screws. Nails hold better under thermal movement and vibration. Watch for raised seams. Sand or plane if needed so your underlayment lays flat. And before covering anything, fix ventilation problems, add baffles where insulation blocks soffits, and check for oversize can lights or bath fans venting into the attic. A perfect shingle roof cannot overcome trapped moisture beneath it.
Edge metals and water management
Drip edge is not optional. It controls water like a dam controls a river. Along eaves, install drip edge under the ice barrier and underlayment, and over the fascia. Along rakes, the metal belongs over the underlayment. I prefer a profile with a hemmed edge and a 3 to 4 inch deck leg to resist wicking. Corners should be lapped and snipped so water sheds cleanly, not back into the fascia.
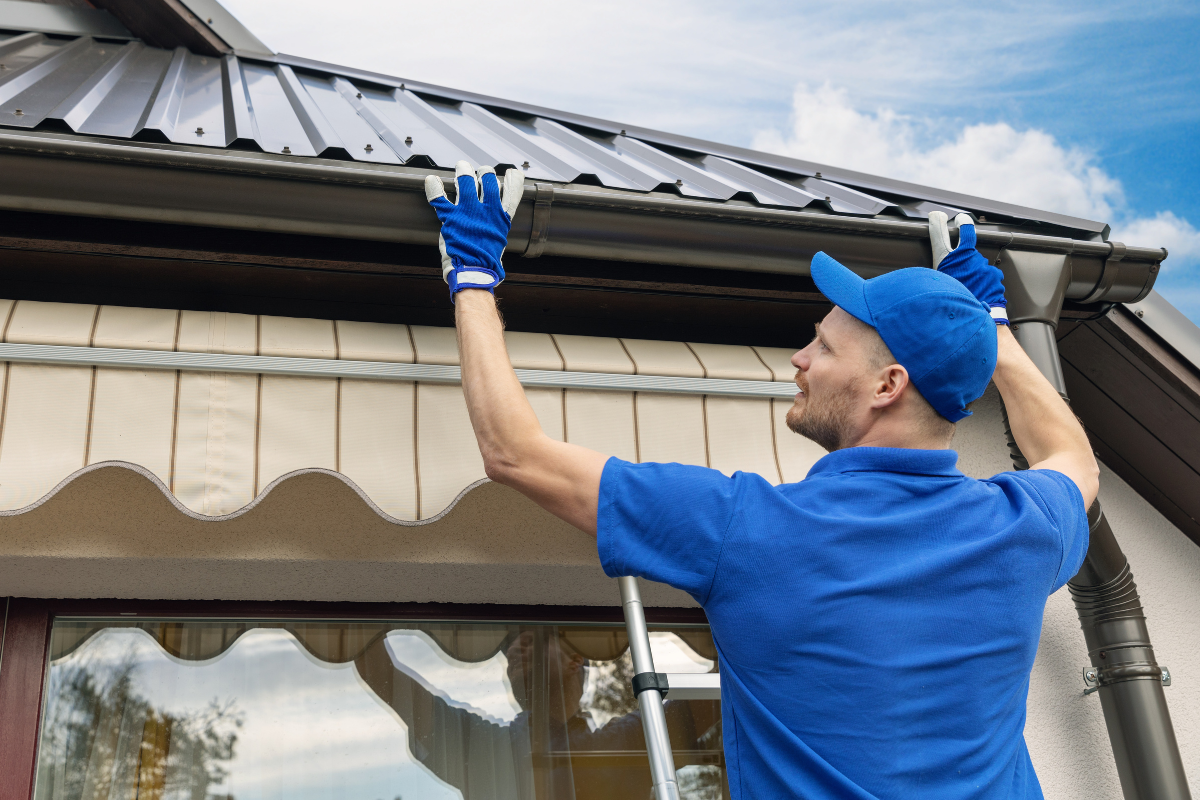
Gutters deserve a look now. If they sit high against the fascia, water can bridge over the drip edge and soak the subfascia. Lowering brackets or adding a small kicker flashing can solve that. On roofs without gutters, kick-out flashing where a roof meets a wall above siding is critical to keep water out of the wall cavity.
Ice and water shield in the right places
In cold climates, install ice barrier from the eaves up to at least 24 inches inside the warm wall, measured horizontally from the interior face. On a 12 inch overhang and a modest pitch, that often means two courses. Valleys get full-width coverage. I also use it around chimneys, skylights, and in dead valleys where snow collects. Self-adhered membranes are unforgiving; snap lines, roll out short runs, and avoid stretching the material, which causes fishmouths.
In hot climates, or on low-slope transitions, a high-temp self-adhered option near metal flashings helps prevent asphalt bleed-through and adhesive creep under extreme heat.
Synthetic or felt underlayment, and why it matters
Synthetic underlayment has earned its place. It resists tearing in wind, lies flatter, and is safer to walk on than old 15-pound felt. That said, not all synthetics breathe the same. On tight, modern homes with excellent attic ventilation, standard synthetics perform well. On marginal ventilation, a felt or a breathable synthetic can give you a small margin against condensation. Fastener schedules are not suggestions. If it says 12 inch vertical and 24 inch horizontal, follow it. Loose underlayment that billows in a wind event can walk nails up and fracture shingles at the worst possible time.
Flashing is a system, not a bead of caulk
I spend as much time on flashing details as on shingle layout, because leaks almost always start where materials change. Step flashing at sidewalls should be individual L-shaped pieces, each lapped with the shingle course. One long continuous L flashing, often called a “headwall flashing,” belongs at the top of a sloped plane where it meets a vertical wall. Counterflashing should cover the top leg of base flashings, either cut into a mortar joint on brick or run behind siding. Caulk is a secondary defense and should never be the only thing keeping water out.
Chimneys are their own animal. Plan on saddle crickets on the uphill side for chimneys wider than 24 inches. Copper or prefinished steel both work, but match the local environment. On coastal homes, aluminum corrodes around treated wood and salt, so use proper isolation or a different metal. Skylights should have factory flashing kits when possible. If you’re fabricating your own, integrate them exactly like a chimney with step and counter pieces.
Starter course and layout that avoids fishhooks
The starter course does two jobs: seals the bottom edge against wind lift and provides a straight line. Use manufacturer starters or invert three-tab shingles and cut the tabs off so the adhesive strip lands correctly. Do not start your course with cutoffs that have no seal strip at the eaves.
Snap a long, accurate reference line and work from it. A chalk line lightly dusted to avoid permanent staining does the job. On laminated architectural shingles, watch for pattern repetition. Most brands include a recommended offset in the instructions. Follow it to avoid zippering - a diagonal line of joints the eye catches from the street.
At rakes, leave a small overhang, typically 3/8 to 1/2 inch past the drip edge. At eaves, 1/4 to 3/8 inch is enough to encourage clean drip without capillary draw behind the fascia. Too much overhang droops, too little invites water back into the wood.
Nails: type, placement, and the quiet killer of warranties
Use hot-dipped galvanized or stainless steel nails where code or environment dictates. Length should penetrate the deck by at least 3/4 inch, or fully through 3/8 inch sheathing. Coil nailers speed production, but hand-driven nails give you more control near delicate areas. Either way, nail heads should be flush, not sunk, and certainly not proud. Overdrives cut the mat and void pull-through resistance. Four nails per shingle is common, six in high-wind zones. Every manufacturer publishes nail zone diagrams. Keep nails out of the sealant line. I still see new roofs with nails just above the exposure line that weep in a driving rain.
Valleys: cut, woven, or closed, and when to use each
Open metal valleys are my default in heavy rain or snow country. Properly sized W-valley metal, centered and fastened outside the water course, with shingles trimmed cleanly and offset from the center line, moves water and debris without trapping it. Closed-cut valleys look tidy and shed water well on simpler roofs with lighter tree litter. Woven valleys have fallen out of favor with most laminated shingles because the bulk creates lift and the design can trap debris. Whatever you choose, be consistent and follow the manufacturer’s pattern.
Penetrations and vents that outlast the shingles
Plumbing vent boots fail more often than shingles, especially cheap rubber ones that crack under UV. Upgrade to a long-life boot with a metal base and a higher-grade elastomer, or use a two-piece system with a separate storm collar that can be renewed later without pulling shingles. For HVAC flues, use double-wall B-vent with proper storm collars and high-temp sealant under the collar, not smeared around the outside.
Ventilation solves more roofing problems than any other single intervention. Calculate net free vent area. A common rule is approximately 1 square foot of net free area per 300 square feet of attic floor area with balanced intake and exhaust. Ridge vents paired with continuous soffit vents provide even flow. Box vents work on hip roofs with limited ridge but need enough intake to be effective. Do not mix ridge power fans with passive ridge vents on the same attic chamber, or they short-circuit air flow. Baffles at the eaves keep insulation from choking intake.
Ridge and hips, where wind meets finish
Hip and ridge caps finish the look and protect the transitions. Many laminated shingles can be cut into ridge caps, but factory-formed caps handle bends cleanly and age better on sharper hips. Nail placement matters here as well. Keep nails high enough to be covered by the next cap but low enough to catch the thickest part of the shingle. On ridges with ridge vent, fasten through the vent body into the deck as specified. On coastal or high-wind sites, use a high-wind cap system and consider a sealant dot under each cap end.
Cleanup, quality control, and details people actually notice
Neighbors judge a shingle roofing contractor as much by the cleanup as by the roof lines. Run a magnetic sweeper around the house more than once. Look in shrubs and along driveway seams. Check gutters for nails and granules. Inside, visit the attic after the first rain. If you see any drip at nails, it may be condensation striking cool metal in a newly sealed attic rather than a leak, but track it. Persistent drips under only one plane suggest a flashing issue.
Walk the roof on a cool morning. Look for raised shingle corners, fishmouths in underlayment telegraphing through, or flashing pieces that look wavy. Correct those before heat welds the sealant lines.
Cost ranges and what drives them
Material costs vary by brand and region, but a mid-grade laminated shingle system with synthetic underlayment, ice barrier, metal valleys, and ridge vent often lands between 4 and 8 dollars per square foot installed in many markets. Steeper pitches, multiple stories, complex valleys, skylights, and chimneys add labor. Premium impact-resistant shingles may add 20 to 40 percent but can lower insurance premiums in hail regions. Layer tear-off adds debris costs and time. Deck replacement can swing a budget quickly; a handful of sheets is routine, a full redeck is not.
If you’re comparing bids, confirm they include the same scope: drip edge, ice and water, underlayment type, valley approach, flashing replacement rather than reuse, ventilation upgrades, and disposal. Apples-to-apples comparisons reveal the bargain bid that skipped half the system.
DIY or hire a pro, and how to pick the right one
Some homeowners can handle a straightforward shingle roof repair on a small plane or a detached garage. Full roof shingle replacement demands endurance, staging, and an eye for details that aren’t obvious until you’ve watched water behave in storms. The work is not complicated, but it is exacting. If you hire, prioritize a shingle roofing contractor with a track record in your climate and certifications with the shingle manufacturer you prefer. Ask for addresses you can drive by, not just photos. Good contractors talk you out of unnecessary add-ons and into correct details. They also pull permits where required, schedule inspections, and register warranties properly.
Weather windows and timing
Asphalt shingles prefer moderate temperatures during installation. In cool weather, seal strips take longer to activate and may need temporary hand-sealing on rakes and ridges. In high heat, shingles are more pliable and scuff easily. I avoid foot traffic on fresh courses in midday heat. Spring and fall offer the best balance in many regions, but crews work year-round with adjustments. Plan around a reliable two to three day clear forecast for average homes, longer for complex roofs. If a surprise storm approaches, button up with tarps overlapped like shingles, secured at the ridge, not just at the eaves, so wind doesn’t turn them into sails.
The checklist, condensed for the day of work
- Protect site and set safety: anchors, brackets, tarps, debris plan, daily magnetic sweeps. Tear-off by section: remove shingles and nails, keep deck clean, expose and inspect. Repair deck and ventilation: replace soft sheathing, add baffles, correct bath fan vents. Install metals and layers: drip edge, ice barrier, underlayment, valleys, flashings integrated. Lay shingles and finish: starters, field with correct offsets and nails, penetrations, vents, hips and ridge, final inspection.
What separates a durable roof from an average one
A durable shingle roof is the sum of small decisions. Fasteners that neither cut nor sit proud. Ice barrier that actually reaches the warm wall. Step flashing placed piece by piece, never caulked into a wish. Underlayment that lies flat and stays fast in a night wind. Balanced intake and exhaust that keeps the deck dry through seasons. Those choices don’t add spectacle, they add years.
I recall a steep 8:12 cape near the coast where the homeowner complained of chronic ice dams along a north eave. The prior roof had premium shingles but no soffit intake and a patchwork of box vents high on the slope. We opened a continuous soffit vent, added baffles to every bay, swapped to a ridge vent, and extended ice barrier to 30 inches inside the wall. The next winter brought the same storms, fewer icicles, and no interior staining. The shingles took credit, but the quiet hero was ventilation and water management below them.
Maintenance over the first five years
A new roof shouldn’t demand attention, but a small maintenance habit pays off. After big wind events, glance at rakes and ridges for lifted caps. Clear leaves from valleys each fall. Keep branches from scuffing the surface. Clean gutters so water doesn’t back up under the first course. Every couple of years, check plumbing boots for early cracking. On south-facing slopes in hot climates, early granular loss around vents and chimneys is common; it’s worth catching so you can decide whether a small roof shingle repair or a targeted coating on flashing bases will forestall bigger work.
Beware of pressure washing. It strips granules and voids many warranties. Moss can be managed with gentle brushing and zinc or copper strips near the ridge that release ions during rain. Algae stains are cosmetic and can be treated with manufacturer-approved cleaners and low-pressure rinses.
Documentation and warranty registration
Save invoices, material wrappers, shingle batch codes, and photographs of underlayment and flashing details before the shingles cover them. Register the warranty if the manufacturer requires it. This is painless and turns a stack of promises into documented coverage. If you ever sell the house, a tidy package of roof documentation reassures buyers and appraisers, and it gives your shingle roofing contractor credibility for future service.
Final thoughts from the field
Good shingle roofing is patient work. The most common failures show up at interfaces, not in the wide-open field of shingles. If you slow down at those interfaces - eaves, rakes, valleys, walls, chimneys, penetrations, ridge - you earn a roof that ages predictably and quietly. Whether you’re swinging the hammer yourself or hiring a pro, use the steps in this checklist to stage the job, verify quality, and avoid the shortcuts that lead to callbacks.
A roof should vanish into the background of your home’s life. With the right system under the shingles, the right nails in the right places, and a clear plan from tear-off to ridge cap, it will.
Express Roofing Supply
Address: 1790 SW 30th Ave, Hallandale Beach, FL 33009
Phone: (954) 477-7703
Website: https://www.expressroofsupply.com/
FAQ About Roof Repair
How much should it cost to repair a roof? Minor repairs (sealant, a few shingles, small flashing fixes) typically run $150–$600, moderate repairs (leaks, larger flashing/vent issues) are often $400–$1,500, and extensive repairs (structural or widespread damage) can be $1,500–$5,000+; actual pricing varies by material, roof pitch, access, and local labor rates.
How much does it roughly cost to fix a roof? As a rough rule of thumb, plan around $3–$12 per square foot for common repairs, with asphalt generally at the lower end and tile/metal at the higher end; expect trip minimums and emergency fees to increase the total.
What is the most common roof repair? Replacing damaged or missing shingles/tiles and fixing flashing around chimneys, skylights, and vents are the most common repairs, since these areas are frequent sources of leaks.
Can you repair a roof without replacing it? Yes—if the damage is localized and the underlying decking and structure are sound, targeted repairs (patching, flashing replacement, shingle swaps) can restore performance without a full replacement.
Can you repair just a section of a roof? Yes—partial repairs or “sectional” reroofs are common for isolated damage; ensure materials match (age, color, profile) and that transitions are properly flashed to avoid future leaks.
Can a handyman do roof repairs? A handyman can handle small, simple fixes, but for leak diagnosis, flashing work, structural issues, or warranty-covered roofs, it’s safer to hire a licensed roofing contractor for proper materials, safety, and documentation.
Does homeowners insurance cover roof repair? Usually only for sudden, accidental damage (e.g., wind, hail, falling tree limbs) and not for wear-and-tear or neglect; coverage specifics, deductibles, and documentation requirements vary by policy—check your insurer before starting work.
What is the best time of year for roof repair? Dry, mild weather is ideal—often late spring through early fall; in warmer climates, schedule repairs for the dry season and avoid periods with heavy rain, high winds, or freezing temperatures for best adhesion and safety.